Segmenting is the act of dividing an email subscriber list into smaller groups based on criteria like interests, location, engagement, or purchase history. When you segment email lists, you’re able to target and engage with different audiences so every subscriber gets content relevant to them with the goal of delivering better results for your business.
When you send an email, you want readers to open it, read it, engage with it, and take the action you want them to take. If they relate to the content and feel it adds value in some way, they’re much more likely to complete those actions.
In this reading, you will gain a high-level understanding about how to use a tool called Constant Contact to segment your lists.
Constant Contact
Constant Contact is an online marketing tool that offers many online marketing capabilities. This reading focuses on using it for email segmentation, but there are also other features to explore if you are interested in becoming an expert in digital marketing. Constant Contact offers a 60-day free trial where you can try out all the tools it has to offer.
Segmenting in Constant Contact
To begin, it’s important to understand the difference between lists, segments, and tags. Watch Tutorial: Differences Between Lists, Tags, and Segments from Constant Contact to learn more. Once you understand how lists, segments, and tags work in Constant Contact, you can start segmenting.
Next, you will need to create an account. You can sign up for the free trial, or if you already know you’re going to use Constant Contact over a long period of time, sign up as a paid customer.
Consider whether you already have a list or are creating a list for the first time. You can import an existing list into the program, or you can get started with just a few contacts. Visit the contacts page where you can start creating and adding lists.
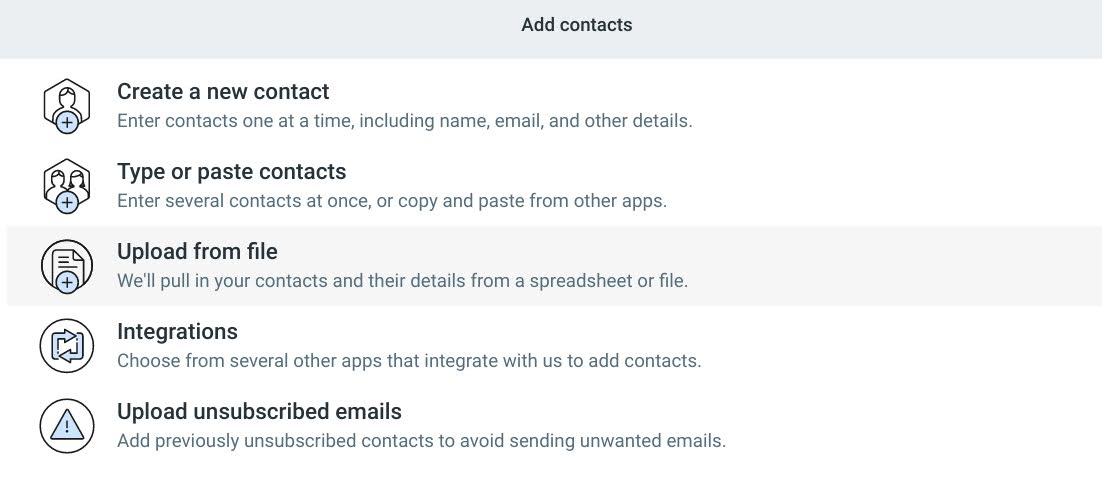
Click “Add to Contacts” to access several ways to add people to your list. If you will be adding contacts one at a time, click “Create a New Contact.” If you have a spreadsheet or file that contains your contacts, you can upload that by clicking “Upload From File.” You will be given a few other options as well, pictured below.
Constant Contact’s interface showing several strategies for adding contacts.
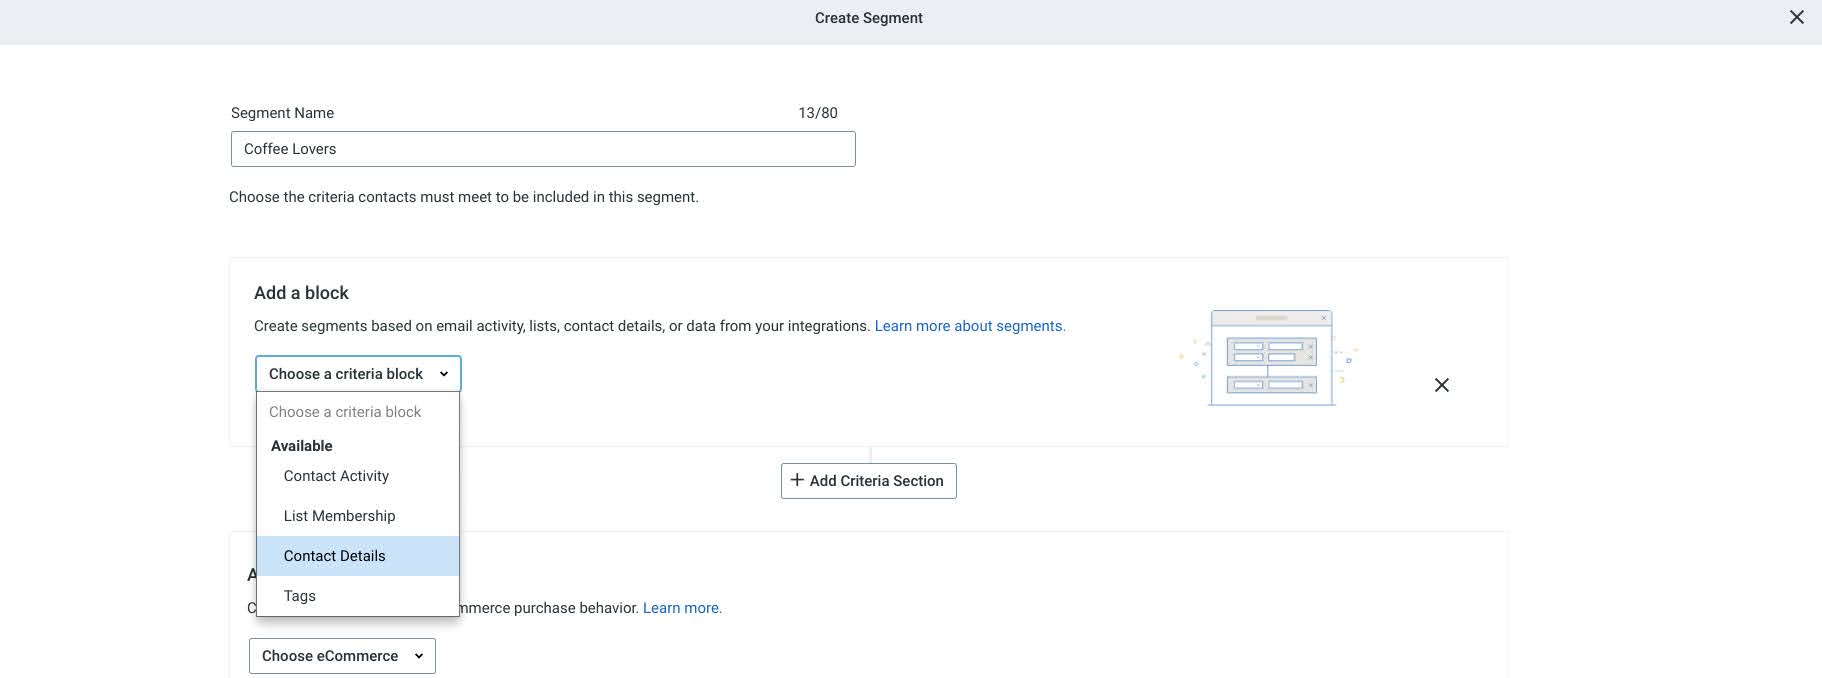
Once you have created or uploaded your lists, click on “Segments” in the navigation bar just under “Contacts.” Here, you can start sending targeted emails based on engagement, or you can click on “Create A Segment.” You will be redirected to a new page where you can name your lists and decide how you want to segment them. Click on the “Add A Block” dropdown menu and select one of the options. From there, you can break it down even more.
Constant Contact’s interface that shows how to create a segment.
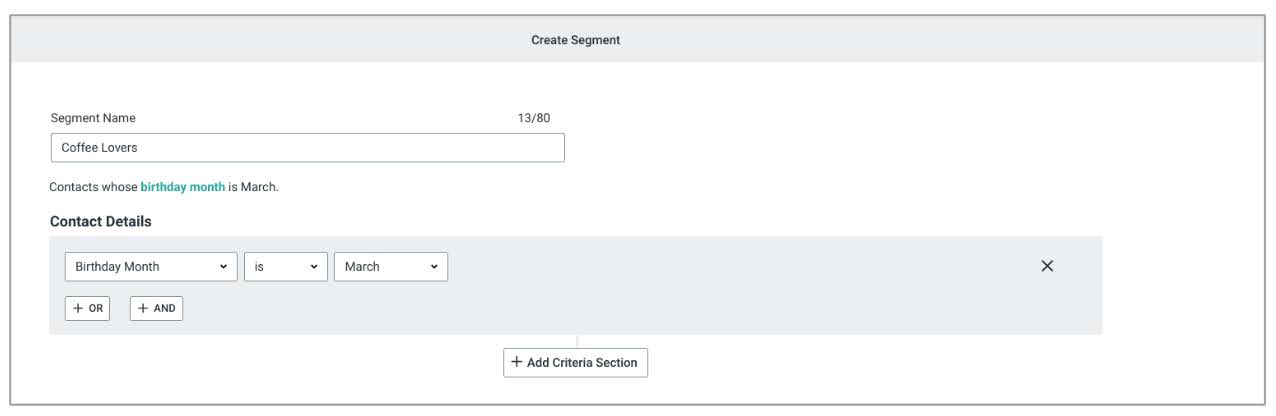
Constant Contact allows you to get very specific with your identifiers. For instance, if you want to send a promotional email to subscribers that are coffee fanatics with March birthdays, you can do that.
Once you make those adjustments to your list, click “Save” and your list will be created. Head back to the “Segments” panel to look at the lists you’ve created.
Additional Resources
After you’ve created your segments, we can learn more about creating and sending emails via Constant Contact by watching Tutorial: Create an Email.
To learn about other features like click segmentation, watch Tutorial: Using Click Segmentation in an Email.